이전포스팅 CentOS7 mysql 설치 방법에 대한 포스팅 글을 참고하기 바란다.
1. Apache 설치
apache.org 공식홈페이지에서 최신버전을 다운로드 받도록 한다
wget http://archive.apache.org/dist/httpd/httpd-2.4.18.tar.bz2
tar xvf httpd-2.4.18.tar.bz2
cd httpd-2.4.18
preforck 방식 및 worker 방식의 최대접속 값을 지정하는것이다. 기본값은 너무 낮게 설정되어있기 때문에 튜닝이 필요하다.
vi server/mpm/prefork/prefork.c
#define DEFAULT_SERVER_LIMIT 4096 (수정)
vi server/mpm/worker/worker.c
#define DEFAULT_SERVER_LIMIT 20
ssl 인증서를 함께 사용해야되기 때문에 그에 관련된 개발도구를 설치하도록한다.
yum install openssl-devel
환경설정 및 본격적인 설치를 진행하도록 한다.
./configure --prefix=/usr/local/httpd-2.4.18 --enable-mods-shared=most --enable-ssl --enable-modules=ssl --enable-rewrite --with-included-apr --with-included-apr-util --enable-deflate --enable-expires --enable-headers --enable-proxy --enable-mpms-shared=all --with-mpm=event && make && make install
동작방식은 기본 event 방식을 취한다. prefork 및 worker 방식보다 좋기 때문이다.
configure: error: Bundled APR requested but not found at ./srclib/. Download and unpack the corresponding apr and apr-util packages to ./srclib/.
위 에러 문제를 해결하기 위해서는 configure: error: Bundled APR requested but not found at ./srclib/. Download and unpack the corresponding apr and apr-util packages to ./srclib/. 해결방법 문서를 참고하면 된다.
에러문제가 해결되었으면, 다시 apache 디렉토리로 이동해서 설치를 다시 진행한다.
설치가 완료된 모습이다.
설치된 디렉토리를 간편하게 보기위해서 링크를 걸어준다.
ln -s /usr/local/httpd-2.4.18/ /usr/local/apache
httpd.conf 파일 및 여러 환경설정 변경 방법은. [Apache(httpd.conf 아파치환경설정) 튜닝] 포스팅를 참고하면 된다.
2. PHP 설치
기본적으로 설치는
cd /usr/local/src
이곳에서 진행 한다.
아래 공식홈페이지에서 php7 버전을 다운로드 한다
wget http://ar2.php.net/get/php-7.0.4.tar.gz/from/this/mirror -O php-7.0.4.tar.gz
tar xvfz php-7.0.4.tar.gz
cd php-7.0.4
./configure --prefix=/usr/local/php-7.0.4 --with-config-file-path=/usr/local/php-7.0.4/lib --with-apxs2=/usr/local/apache/bin/apxs --with-gd --with-freetype-dir --with-zlib --enable-sockets --enable-gd-native-ttf --with-png-dir --with-jpeg-dir --enable-sigchild --with-gettext --enable-mbstring --enable-inline-optimization --enable-bcmath --enable-shmop --enable-calendar --enable-ftp --with-gdbm --with-iconv --enable-mbregex --with-openssl --with-curl=/usr/local/curl/ --enable-soap --disable-debug --with-mcrypt --with-kerberos --enable-zip --with-zlib-dir --enable-exif --enable-fpm --with-fpm-user=nobody --with-fpm-group=nobody --with-mysql=/usr/local/mysql --with-mysqli=/usr/local/mysql/bin/mysql_config --with-pdo-mysql=shared,/usr/local/mysql && make && make install
[TIP]
error: mcrypt.h not found. Please reinstall libmcrypt
위와 같은 에러가 발생되면 configure error mcrypt.h not found. please reinstall libmcrypt 설치 에러 해결방법 다른 포스팅을 참고하면 해결할수 있다.
make: *** [ext]mysqli]mysqli_embedded.lo] 오류 1
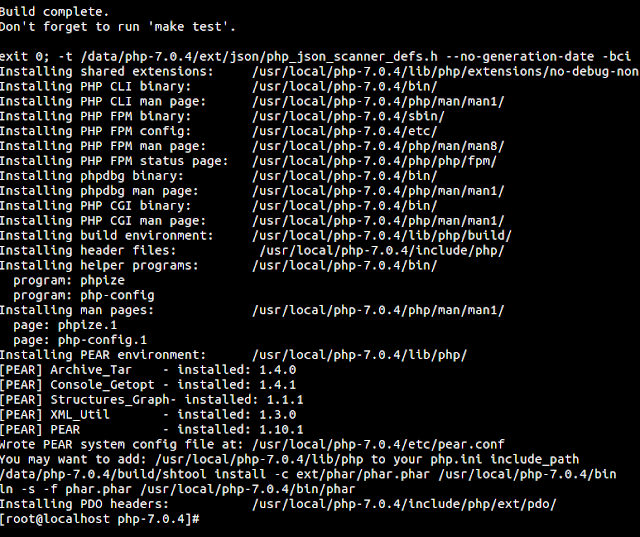
정상적으로 설치가 완료되었으면 위와같은 화면을 확인할수 있다.
앞에서 심볼링 링크 작업한것처럼 이곳에서도 작업을 진행한다. 소스컴파일을 할 경우 수동으로 작업해줘야되는 부분이 많이 존재한다.
ln -s /usr/local/php-7.0.4/ /usr/local/php
ln -s /usr/local/php/bin/php /usr/sbin/
ln -s /usr/local/php/bin/phpize /usr/sbin/
php -v
PHP 7.0.4 (cli) (built: Apr 8 2016 16:41:41) ( NTS )
Copyright (c) 1997-2016 The PHP Group
Zend Engine v3.0.0, Copyright (c) 1998-2016 Zend Technologies
php.ini 환경설정값을 php 설치된 디렉토리로 복사한다.

cp /usr/local/src/php-7.0.4/php.ini-development /usr/local/php-7.0.4/lib/php.ini
문제 없이 서비스가 올라가졌다면, 위와 같이 열려있는 포트를 확인할수 있게 된다.
[TIP]
1) php 초기설정
vi /usr/local/php-7.0.4/lib/php.ini
short_open_tag = On
error_reporting = E_ALL & ~E_DEPRECATED & ~E_NOTICE & ~E_STRICT
display_errors = On
date.timezone = "Asia/Seoul"
2) 설치 확인방법
APM 설치가 정상적으로 완료되었는지 최종확인하는 방법이다. 아파치 초기 index.html 파일을 수정하면 된다.
vi /usr/local/apache/htdocs/index.php
###추가####
<?php
phpinfo();
?>
######
3. 결과
http://192.168.0.5
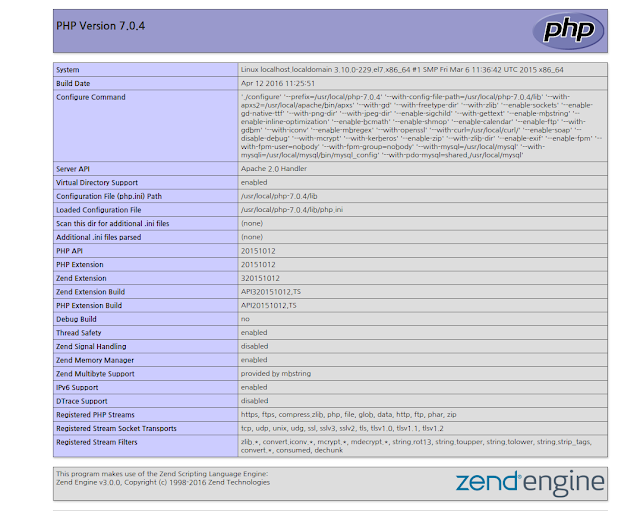
성공이다.
이곳에서 각종 설정값을 확인할수있다.